" How do I replace the hose on a gas BBQ Grill "
Tools and Materials You'll Need:
Replacement gas grill hose (make sure it's compatible with your grill)
Adjustable wrench
Pipe thread sealant (Teflon tape)
Soap and water solution (for leak testing)
Step 1: Safety Precautions
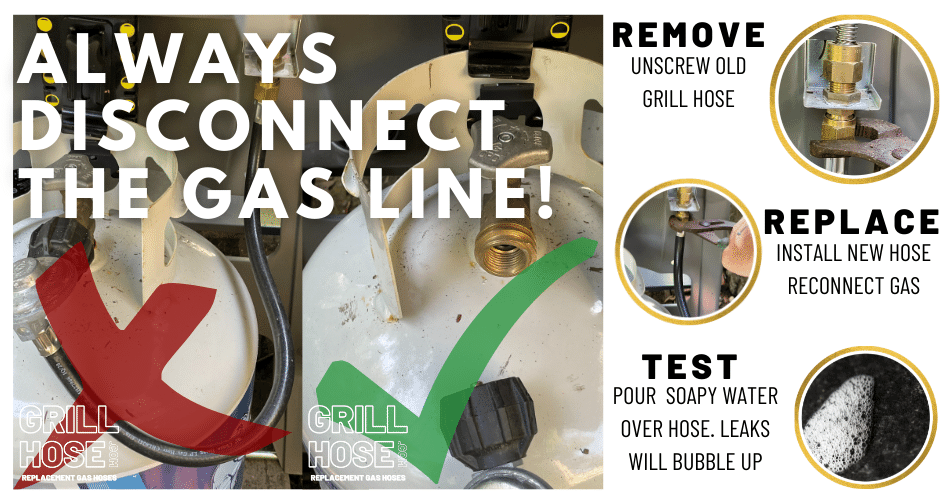
Before you begin, ensure you are working in a well-ventilated area, away from open flames or sparks. Turn off the gas supply at the propane tank or natural gas source. Disconnect the grill from the electrical outlet if it's an electric start grill.
Step 2: Remove the Old Hose
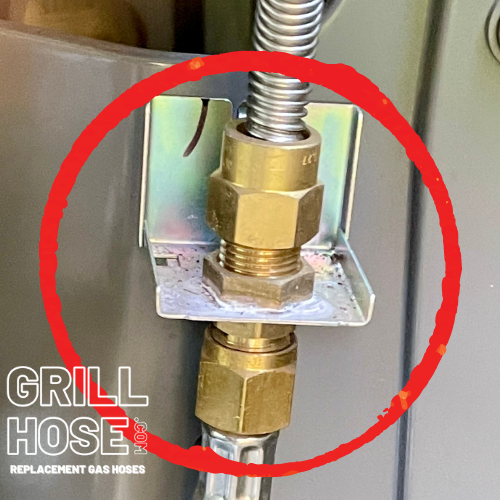
Locate the gas hose that connects the propane tank or natural gas line to your grill. This hose typically attaches to the regulator on one end and the grill manifold on the other.
Using an adjustable wrench, carefully loosen and remove the hose connection from the grill manifold. Turn it counterclockwise to unscrew it.
Note: Some grills may have additional components like a quick-release coupling or a connector with a retaining clip. If so, follow the manufacturer's instructions for disconnecting them.
Step 3: Inspect the Connection
Examine the grill manifold and the regulator for any signs of damage or corrosion. If you notice any issues, they may need to be addressed before proceeding.
Step 4: Remove the Hose from the Regulator
Now, locate the other end of the hose connected to the regulator (usually attached to the propane tank or natural gas line).
Using your adjustable wrench, carefully loosen and remove the hose connection from the regulator. Again, turn it counterclockwise.
Step 5: Remove the Old Hose
Carefully remove the old hose from the grill, ensuring there are no sharp bends or kinks that could damage the new hose.Step 6: Prepare the New Hose
Take your replacement gas grill hose and inspect it for any damage or defects.
If the hose did not come with a pre-installed fitting, you may need to attach fittings to both ends of the hose. Follow the manufacturer's instructions for this process.
Step 7: Apply Pipe Thread Sealant
Apply a few wraps of Teflon tape to the threads of the hose connections on both ends. This helps create a secure, leak-proof seal.
Step 8: Attach the New Hose
Attach one end of the new hose to the grill manifold. Thread it clockwise and tighten it with your adjustable wrench. Be careful not to overtighten, as this can damage the threads.
Attach the other end of the new hose to the regulator or gas source in the same manner.
Step 9: Leak Testing
To ensure there are no gas leaks, perform a leak test:
Mix a solution of soapy water (liquid dish soap) and water.
Apply the soapy water solution to all the connections, including the hose ends, regulator, and manifold.
Turn on the gas supply (slowly) and check for any bubbles forming at the connections. If bubbles appear, there's a leak.
If you detect a leak, immediately turn off the gas supply and re-tighten the connections.
Repeat the leak test until there are no bubbles.
Step 10: Final Check
Double-check all connections for tightness and that there are no gas leaks. Ensure the hose is not kinked or pinched.
Step 11: Turn on the Gas
Once you are confident that there are no leaks and everything is securely connected, you can turn on the gas supply at the propane tank or natural gas source.
Step 12: Test Your Grill
Ignite your grill and allow it to heat up for a few minutes. Ensure that it's operating properly and that the flames are consistent.
Step 13: Dispose of the Old Hose
Dispose of the old gas grill hose safely, following any local regulations or guidelines for hazardous waste disposal.
Congratulations! You have successfully replaced the gas grill hose on your barbecue. Regularly inspect and maintain your grill to ensure safe and enjoyable outdoor cooking experiences.

